IN THIS ARTICLE
LINKS
🔗 Convert an older-format Primafact case to the Primafact 6 Case Format (black folder)
🔗 Use Case Template to create a new case
🔗 Apply Case Template settings to an existing case
🔗 Create Binders, Tabs and Sections
About Case Templates
What is a Case Template?
A template is the foundation of your files, providing the scaffolding Case structure onto which your new client files will be built. You use a Case Template to create a new, pre-configured Case, and you can also use Case Template settings to quickly update existing cases to match the template standard (Setup Case from Template).
Primafact 6 comes packaged with pre-set templates. (If you are on an early build of Primafact 6, we recommend you update to a more recent version to obtain the templates). You can modify these templates or create fully custom templates that you build yourself.
Why use Case Templates?
Similar to precedents found in a law firm, Templates allow files to be quickly assembled to a consistent standard. The new Case can be amended with additional Binders, tabs and sections, and the case's coding and views can be configured as needed to reflect the unique needs of the file.
What's included in a Case Template?
Each Case includes one or more binders organized with tabs & sections. Templates can also include Case-specific coding, including Annotation Color Labels, Annotation Issues, Team Flag Labels along with List Views, Autocompletes and Annotation Form Options.
Where are Case Templates located in Primafact?
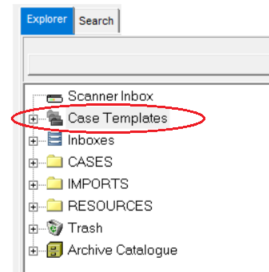
Case Templates are housed in the Case Templates folder, and accessed via the Explorer panel in Primafact.
Unless you are creating or modifying a Case Template, you should never need to access the Case Templates folder; templates and their settings are incorporated via forms and menus that appear when you create a new case or when you setup case customizations using a Case Template.
What happens when I update a Case Template?
Future updates to a Case Template do not impact settings applied to existing Cases based on a prior version of the template.
However, if a Case Template setting uses Primafact Global Defaults, your Case's associated settings will update as those Global Annotation Color labels are changed. (This can be "locked down" by applying "Override" to the applicable settings on the Case.)
Example: Your Case Template uses Global Defaults for Annotation Color Labels. When Global Annotation Color Labels are Updated - e.g. Blue changes from "Liability" to "Witness Question," your Case's blue color label ("Liability") will update to match the updated Global settings ("Witness").
This can be desirable when making new labeled colors available, but can be a problem when existing annotations are now coded differently than when they are created.
Future updates to a Case Template will not impact any existing Cases or Case Settings based on an earlier version of the template. If a Template incorporates Global Default settings for a coding group (e.g. Team Flags, or Annotation Colors), those settings are subject to change on your Case unless you "override" the defaults for those coding groups on your Case.
![]()
Video Tutorial: Using Case Templates
Managing Case Templates
Creating a Case Template "from scratch"
Primafact 6 comes packaged with pre-set templates. (If you are on an early build of Primafact 6, we recommend you update to a more recent version to obtain the templates). You can modify these templates or create fully custom templates that you build yourself.
To create a new template:
- Right-click the Case Templates folder in the Explorer panel of Primafact.
- A pop-up menu will appear. Click New > Case.

- The Create New Case Template window will appear.
- Enter your Template's name in the New Case Template Name field.

- Select or Deselect Case Permissions dialog... checkbox

Note: The Copy DOCUMENTS [...] and Copy PERMISSIONS [...] are not relevant if you are creating a new Case Template "from scratch," as there is nothing to copy. You can leave those boxes checked or unchecked. - Click Create Template to create your new Case Template.

- This Primafact Message window will appear. Click OK.

- If the Show Case Permissions dialog automatically [...] checkbox was checked, you will see the Case Permissions window. See Managing Case Permissions for details on applying these settings. When complete, click OK to preserve your settings.

If this checkbox was unchecked, you will not see this screen, but can access it later on the Case Template's Summary Screen (your Case Template will need at least one binder to access the Summary screen.) - Your New Case will appear inside the Case Templates folder:

Note: The position of your new Case Template within the folder will vary based on the name of your Template; Case Templates are listed in alphabetical order. - Now that your new Case Template has been created, add one or more Binders, import or copy any standard Case Documents, and configure your template's Case Settings by copying from other Templates, or adding Coding and Views from scratch.
Template configurations can be updated later; keep in mind that future updates to your Case Template will not impact settings on existing Cases created or configured using an earlier version of the Case Template.)
Future updates to a Case Template will not impact any existing Cases or Case Settings based on an earlier version of the template.
Creating a Case Template from a Base Template (Copy Template)
If you wish to create a new Case Template that is similar to an existing Case Template or Primafact Case, you can copy a Case Template. You can copy the entire Case Template, including binder structure, documents, Case Permissions and Label and View settings, or you can copy just the binder and selected settings.
To copy an existing Case Template:
- Right-click the Case Templates folder in the Explorer panel of Primafact.
- A pop-up menu will appear. Click New > Case.
- The Create New Case Template window will appear.
- Enter your new Template's name in the New Case Template Name field.
- To copy another Case Template, use the Copy from the following Case Template dropdown to select your base template.

 Note: If you want to copy a regular Case instead of a Case Template: Unchecking the Case Templates Only checkbox allows you to copy a regular Primafact Case to create your new Case Template.
Begin typing in the name of the Case in the Select a Template field, or choose from the dropdown menu. - Next, Select which of the checkbox options you prefer to use:

- Copy DOCUMENTS [...] will include any documents from the copied Case Template into your new Template (desirable if your base Template incudes any standard documents, such as Case Procedures, Retainers and Authorizations). (You will likely not wish to copy the Case documents if you are copying a regular Primafact Case.)
- Copy PERMISSIONS [...] copies any pre-set Case Permissions (used for Case administration and Case Settings) from the base Template.
- Next, select or Deselect Case Permissions dialog [...] checkbox

- if checked, the Case Permission dialog will open when creating a new Case based on the new template you are creating, allowing the creator to adjust Case Permissions while creating a new Case.
- Deselecting the checkbox bypasses the Case Permissions dialog when setting up a new case. This can make the setup process a few seconds quicker, and is useful if you want to require new Cases based on your template to have specific settings that will not be modified by the person opening the new Case. This can be undesirable if the person opening the new Case needs to easily adjust new case permissions. - Copying Case Settings or Applying Global Default Settings:
- If you wish to copy all Case Settings (labels, Views, and Autocompletes) from the copied Case Template: Click Create Template to create your new Case Template. Your new Case Template will include all settings from your copied Case Template. Proceed to Step 9.
- If you prefer to use Global Default settings for some or all settings (labels, Views, and Autocompletes) instead of copying the Case Template Settings: Click the Show More button at the bottom left corner of the Create New Case Template window.

- The available Case Settings will appear at the bottom of the Create New Case Template window. (Use the vertical scroll bar to navigate to available options.):

- Click the chevron > beside any heading to expand:

- You will see the expanded section:

Notice that the Copy from Case button is selected on every section. If you prefer to use Primafact Global Defaults for this section, click the Use Defaults button. - Repeat step (e.) for every section that you wish to change from the Copy from Case setting.
- The available Case Settings will appear at the bottom of the Create New Case Template window. (Use the vertical scroll bar to navigate to available options.):
- If you wish to copy all Case Settings (labels, Views, and Autocompletes) from the copied Case Template: Click Create Template to create your new Case Template. Your new Case Template will include all settings from your copied Case Template. Proceed to Step 9.
- When you are satisfied with your selected Case Template settings, click Create Template to save your new Case Template.
- This Primafact Message window will appear. Click OK.
- If the Show Case Permissions dialog automatically [...] checkbox was checked, you will see the Case Permissions window. See Managing Case Permissions for details on applying these settings. When complete, click OK to preserve your settings.
If this checkbox was unchecked, you will not see this screen, but can access it later on the Case Template's Summary Screen (your Case Template will need at least one binder to access the Summary screen.) - Your New Case will appear inside the Case Templates folder:
Note: The position of your new Case Template within the folder will vary based on the name of your Template; Case Templates are listed in alphabetical order.
Once your new Case Template has been created, you can modify it if you wish by adding one or more Binders, importing or copy any standard Case Documents, and adding additional configurations to configuring your template's Case Settings. (These can be updated later; keep in mind that updates to a Case Template will not impact any existing Cases or Case Settings based on an earlier version of the template.
![]()
Convert older version Case Templates to Primafact 6 Templates
Case Templates used in older versions of Primafact differ from Primafact 6 Templates in two key respects:
- In earlier versions of Primafact (version 5 and earlier), Case Templates did not include any Case-level settings (labels, views etc.) because those features were introduced in Primafact 6
- Although most firms keep Case Templates in a dedicated folder, earlier versions of Primafact did not distinguish Case Templates from Cases. Primafact 6 has a built-in location for Templates, accessible from the Explorer panel.
Before you start:
Firms upgrading from earlier-version case template formats will need to convert their existing Case Templates to the "Case" format (binders housed in a black Case folder). A case is in the current format if it is housed in a black folder.
 Firms upgrading from earlier versions of Primafact will need to convert their existing Case Templates to the "Case" format.
Convert an existing Case Template to a Primafact 6 Template:
To convert an older Case Template to a Primafact 6 Case Template:
- Ensure your Template is in the current Primafact 6 Case Format (housed in a black Case folder). If your Cases are not in the Case format, convert your old Cases to the new format.
- Right-click the black folder housing your old Template. Click Cut.
- Right-click on the Case Templates folder.

- Click Paste.
- Your old Template will now behave as a Primafact 6 Case Template.
- Add any coding, views, and permissions you wish to associate with your Template. (Templates can be configured and modified over time).
Configuring Case Template Settings
Adding coding, views and permissions to your Case Template is helpful if you have certain case types or teams whose needs or preferences differ from your Primafact Global Settings. Case Template settings can be used to quickly update an existing Case, and the Case Template settings are automatically added to new cases based on the Template.
To configure your Case Template Settings:
- Create coding and views tailored specifically to your Case Template, or
- Apply settings from other Templates to your current Case Template.
![]()
Turn an existing Case into a Case Template
You can use existing Cases as Templates for other Cases - simply uncheck the Case Templates Only checkbox when copying from a Case Template:

If you wish to convert an existing Case Template, simply Create a new Case in the Case Templates Folder (this Case will automatically become a Template):
- Right-Click on the Case Templates Folder

- Select New > Case
- The Create New Case Template window will appear:

- Name your new Case
- Uncheck the Case Templates Only checkbox and use the Select a Template field to select the Case you will copy.
- Select the specific checkboxes you wish to copy from the Case (for example you may not wish to copy documents or Permissions from the original Case into your Template)

- If you wish to copy all settings and views Click Create Template to complete creating your new Case Template.
(If you wish to selectively copy settings, click Show More and choose the settings you wish to copy, then click Create Template to complete).
![]()
Update Case Template Settings
Case Template settings, including annotation color labels, team flag labels, case views, and case permissions are applied the same way you would apply settings to any Case. Changes to Case Template Settings will not be applied to existing Cases created/configured using the Template.
- Create coding and views tailored specifically to your Case Template, or
- Apply settings from other Templates to your current Case Template.
Updating a Case Template does not impact Cases created or configured using the Case Template
![]()
Delete a Case Template
Delete a Case Template as you would delete a Case (permitted users only). Right-Click the Template and select Delete from the pop-up menu.
If you plan to create a new Case Template using the same name, we recommend renaming the original template before deleting.
Cases opened/configured using the Case Template will not be impacted when the Case Template is deleted.
Deleting a Case Template does not impact Cases created or configured using the Case Template
![]()